General[]
User level: Beginner
Blender version: 2.49
Results: a basic Particle system usable in the GameEngine
Particles in the Blender Gameengine are not the same as particles in the Blender Editor. Gameengine Particles are objects of any type added at runtime. Usually this are small faces with a texture that forms the shape of one or more particles. Particles can be combined to produce some eyecandy effects such as flames, smoke or fireworks. This tutorial describes how to set up a simple particle system. Advanced tutorials will describe how to get some nice effects.
Since Blender 2.42a it is required that added objects are dynamic actors to take care of the initial movement by the edit object actuator. Where dynamic actors are not applicable the particle should get appropriate logic bricks to perform the required movement. This tutorial deals with non-dynamic particles.
Preparation[]
- Create the texture with any paint program. Name it Particle_basic.png. It does not need an alpha channel. You can take it from here:

- Create a new scene in Blender.
- Remove the default cube <x>.
Add the Objects[]
The basic Particle[]
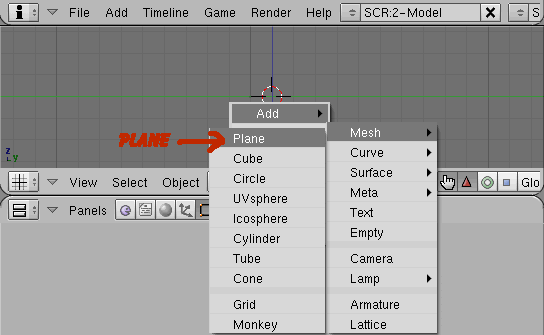
- Add a plane <space> (add->mesh->plane).
- Enter edit mode <tab>.
- Select front view <num 1>.
- Rotate the vertices that the face looks to the left side (along -X) <r>,<-90>,<CR>.
- Leave edit mode <tab>.
- Apply scale and rotation <ctrl>+<a> to make the face point along -X (required for halo mode, see remarks). Reset any rotation <alt>+<r>.
- Select camera view <num 0>.
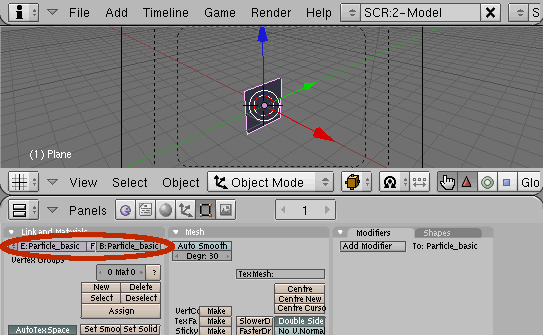
- Alter the mesh name and the object name to Particle_basic to identify the particles later.
- Enter edit mode <tab>. The one face of the basic particle should be selected already. If not select the face <a>.
- apply a texture <u>->unwrap
- Got to Editing buttons <F9> texture face panel
- If it is saying there is no active face switch to face select mode <ctrl>+<tab>,<3> and select the face <a>
- Switch on Tex, Halo and Add under Texture face. Collision can be switched off.
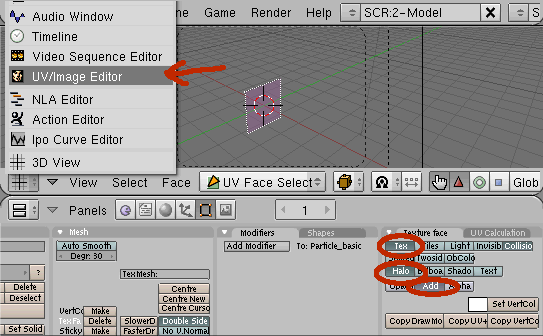
- Switch to the UV/Image Editor
- Open the texture file (Image->Open...) Particle_basic.png (Open Image).
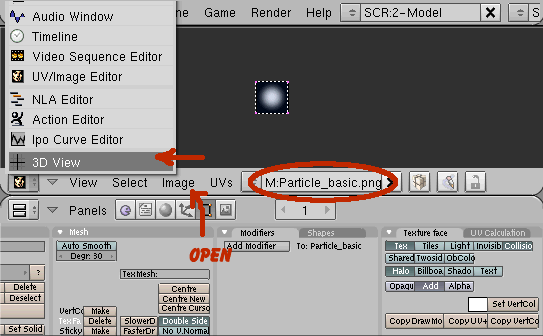
- Return to the 3D View.
- Leave Edit mode <tab>.
- Switch the Draw type to texture mode <Alt><z>.
Material Settings[]
additional settings for Multitexture Materials:
- Apply a material in Shading buttons <F5> in Links and Pipeline panel ADD NEW
- Optional: Change the material name to "Particle_basic"
- In Material panel switch on Shadeless
- In Texture panel add a texture (optional: Call it Particle_basic)
additional settings for for GLSL Materials:
- Apply the settings for Multitexture Materials
- In Material panel switch on ObColor
- In Map Input panel switch to UV
- In Texture buttons <F6>
- Set Texture Type to "Image"
- In Image panel select image "Particle_basic.png"
Particle Logic[]
- Go to the logic buttons <F4>.
- Add and connect following Logic bricks to the Particle_basic (necessary since 2.42a):
- an always sensor,
- an AND controller and
- an motion actuator with the parameters dloc: 0.00, 0.00, 0.50, L disabled
- Now it is time to test the particle in game mode. Press <ctrl><down> to make a full size window.
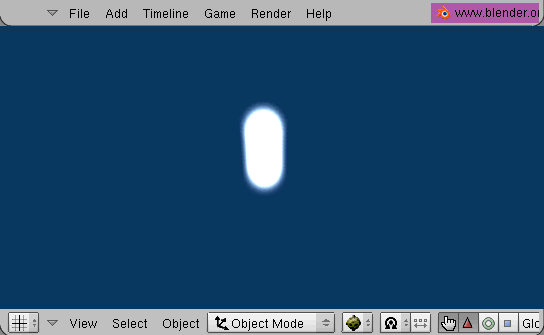
- Make sure you are in camera view (perspective mode). Press <p> to start the Gameengine. You should see following:
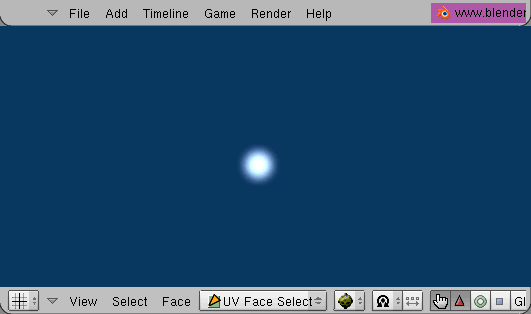
- Leave the Gameengine with <Esc>.
- If you couldn't see the white dot, check the alignment of the face <alt>+<r>.
- Press <ctrl><down> to return from full size window.
- Move the particle to another layer <m>. This is required for the basic emitter.
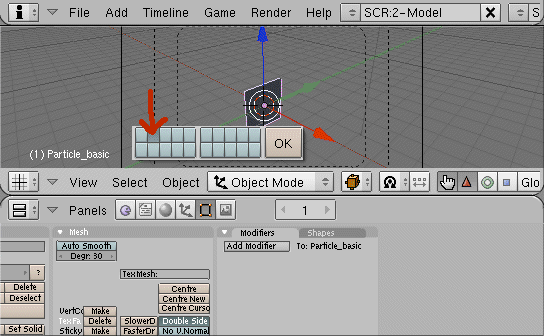
- The basic particle is ready.
The basic Emitter[]
- Go to the first layer <1>. The particle should not be on a visible layer when running the gameengine.
- Select the top view <num 7>.
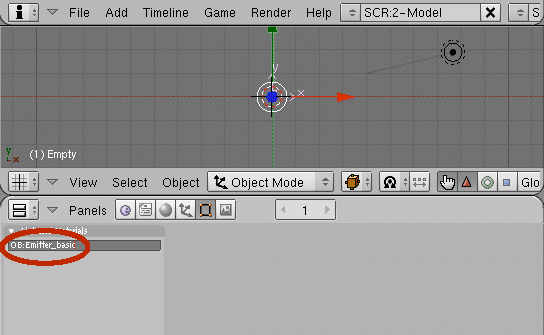
- Add an Empty <space> (add->empty)
- Go to Editing buttons <F9> and name it Emitter_basic (optional).
- Go to Logic Buttons <F4>
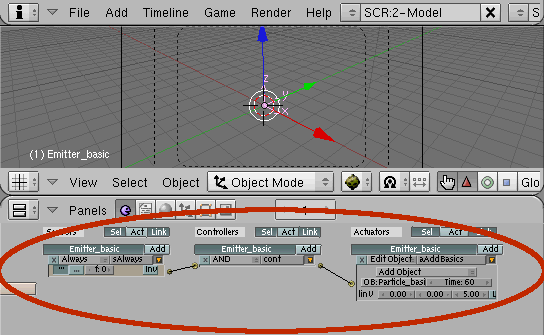
- Add and connect following logic bricks to the Emitter_basic:
- an always sensor (TRUE pulse mode on),
- an AND controller and
- an edit Object actuator with the parameters [add Object], OB:Particle_basic, time 6, linV [0][0][0].
- Attention: LinV does not work in Blender 2.42a and above as long the particles are not dynamic actors. Dynamic actor particles can cause unexpected behaviour and performance issues.
- Note: No actor needed in 2.45, LinV works fine.
- Select camera view <num 0>.
- Press <ctrl><down> to make a full size window.
- Test the Emitter in game mode.
- Press <p> to start the Gameengine.
- The basic Emitter is done.
Remarks[]
- The particle object (Particle_basic) in halo mode will be rotated to the camera around the local axis (rotation in edit mode). The camera will see the particle object as it would see it when looking along the X-axis. The particles face must face the opposite direction (-X). Rotations performed in object mode will not apply. For easier editing the particle object can be rotated to the camera in object mode without effecting the halo faces.
- New particles cannot instanciated by the Gameengine if the layer with the original particle is visible. The original particle will be shown instead.
- Halo faces require a perspective view (e.g. cameraview). In othogonal view the halo faces are not correctly aligned to the screen mostlikely invisible.
- Added objects (the particles) will all have the same name. This is important when referenced by scripts.
|
Continue with Particle flame or up to Special Effects Tutorials |